“How do I find my family genealogy?” is usually asked at the start of a research project — someone has decided they want to build their family tree but has no idea where to begin. The internet is full of “10 easy steps” articles, most of them written for Western families and not applicable to Tamil ancestry.
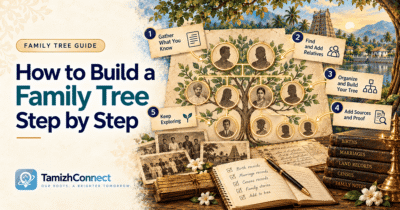
This guide is a concrete four-week starter kit for Tamil family history research. Week by week, it names the specific artifacts to gather, the specific interviews to schedule, the specific archives to search, and the specific tree structure to draft. Follow it and by the end of month one you’ll have a working family tree with 3-4 verified generations and a research plan for the next 5-10 generations.
Week 1: Collect what already exists
The mistake most first-time genealogists make is starting with online searches. The highest-density source of family information isn’t the internet — it’s the artifacts and memories your family already has. Week 1 is inventory.
Documents to gather (physical or scanned):
- Birth, marriage, death certificates for the past 3-4 generations
- Passport, ration card, voter ID for older relatives (dead or living)
- School leaving certificates, matriculation certificates, university records
- Land documents — patta, sale deeds, partition deeds
- Employment records — appointment letters, pension books, service certificates
- Funeral cards / obituaries — see funeral cards guide
- Photographs, especially those with names or dates written on the back
- Family Bibles (Christian families) or family kula deivam registers (Hindu families)
- Old letters, postcards, greeting cards
- Naturalisation / immigration papers (for diaspora families)
Week 1 output: a physical or digital folder containing everything above, plus a spreadsheet listing each item with (source, date, key names / places captured, condition).
Week 2: Interview the elders
Living memory is a perishable resource. Every year, the elders who remember pre-emigration villages, colonial-era migration stories, and 3-4-generations-back names take some of that memory with them. Week 2 is capturing what’s still accessible.
Interviews to schedule:
- Oldest living family member (usually the top priority — pre-1960 memory is disappearing fastest)
- Both parents’ oldest siblings (aunts and uncles — each family branch has different memories)
- Cousins on each family branch (their families may have different family papers)
- Family friends who knew grandparents (outside-the-family perspective sometimes fills gaps)
Interview questions to prepare:
- Grandparents’ full names (given, father’s, caste title)
- Villages, districts, taluks of origin
- Migration story if diaspora family (which ship, which year, which destination)
- Marriage details for the past 3 generations (spouse’s family, spouse’s village)
- Occupation history
- Community affiliations (specific temple / church / kula deivam)
- Family land or property (still owned? sold to whom?)
- Family disputes or estrangements (often explains gaps in the record trail)
Record interviews on audio or video (with permission). Verbatim capture beats notes for verification later.
Week 2 output: 3-5 hours of recorded interviews plus a document of extracted facts (names, dates, places, relationships) per interviewee.
Week 3: Search the record trail
With family artifacts inventoried and interviews complete, you now have specific names, places, and dates to search. Week 3 is chasing those in public records.
Records to search for each named ancestor:
- Civil registration (birth / marriage / death) at district registrar or Tamil Nadu Archives
- Voter rolls (Tamil Nadu Electoral Commission)
- Land records (patta.tn.gov.in for current, district Collector’s office for historical)
- Temple registers (for Hindu ancestors, at the specific family temple)
- Church registers (for Christian ancestors, at the specific diocese)
- Arrival records (for diaspora ancestors, at the destination-country archive)
- Depot records (for indenture ancestors, at Tamil Nadu Archives or India Office Records)
- Census records (for post-1871 India; for diaspora destinations at national censuses)
Start with the most accessible (patta.tn.gov.in for land; TamizhConnect’s indenture search for diaspora arrivals) and expand from there.
Week 3 output: a table listing every named ancestor, the records that reference them, and the evidence trail so far.
Week 4: Draft the tree
By week 4, you should have enough verified information to draft a working family tree. This tree won’t be complete — genealogy is never complete — but it will be a truthful record of what you can prove today, plus a map of what to research next.
Tree drafting rules:
- Every person on the tree is annotated with the source(s) that prove they belong there
- Unverified ancestors are marked “probable” or “unverified” — not committed to the tree as fact
- Conflicts between sources are noted, not silently resolved
- Uncertain relationships (probable cousin, likely half-sibling) are marked as such
Use tree software that supports source annotations (Gramps is free and comprehensive; Family Historian, RootsMagic, and Legacy are paid alternatives). TamizhConnect’s roots-tracing tool is Tamil-specific and integrates with the indenture and voter-record datasets.
Week 4 output: a working family tree covering 3-4 generations back, with source annotations on every ancestor, and a prioritised list of the next 5-10 research questions.
Common first-month mistakes
Five patterns that stall find my family genealogy projects in the first month:
- Starting with DNA. DNA gives percentages, not names. Records first, DNA later.
- Not writing down oral history. Memory that isn’t captured is lost. Every interview should produce a written / recorded record.
- Trusting the first match. Common Tamil names return dozens of plausible candidates. Verify before adding to the tree.
- Ignoring extended family. Cousins often have different family papers and different memories. A tree built from one branch of the family is thinner than one built from all branches.
- Never leaving the internet. The majority of pre-1900 Tamil records are physical. A visit to Chennai / Kew / Aix-en-Provence / the destination-country archive is often part of any serious research project.
The starter kit that actually works
The four-week checklist above compresses about 40 hours of work. It won’t produce a complete family tree — but it will produce:
- An inventory of every family artifact worth preserving
- Interview recordings that capture living memory before it’s gone
- A verified 3-4 generation family tree with source annotations
- A prioritised research plan for the next 5-10 generations
That’s the deliverable most family history projects should be aiming for in month one. Getting there requires discipline more than tools. The specific ancestor finder you use, the specific archive you subscribe to, the specific tree software you choose — none of it matters if the underlying research process isn’t systematic.
When to hire a professional
After four weeks of systematic work, you’ll know whether professional help is needed. Hire a professional genealogist when:
- Records you need are physical and require an archive visit you can’t make
- Records are in a language you can’t read (Tamil script for pre-1970s land documents; Dutch for Suriname; French for Karaikal / Réunion)
- You’ve hit a specific research question (finding a village, verifying a specific ancestor) that’s stuck for weeks
- Family disputes make some interviews inaccessible and you need a neutral outsider
Professional genealogists typically charge £50-150/hour and produce written reports. For Tamil-specific research, look for genealogists with specific South Asian archive experience — the general-Western genealogy skillset doesn’t fully transfer.
Starting to find your family genealogy is straightforward. Finishing it is a lifetime project. But month one is the make-or-break window: get the inventory, capture the memory, verify the first tree, and you have a foundation that extends indefinitely.